Free Overlays and Filters in Filmora for Beginners
Wondershare offers an array of overlays and filters in Filmora that can transform your videos from ordinary to extraordinary. In this guide, I’ll walk you through the process of applying overlays for unique effects and using filters to enhance the overall aesthetics of your footage.
Applying Overlays for Creative Effects
1. Accessing Overlays
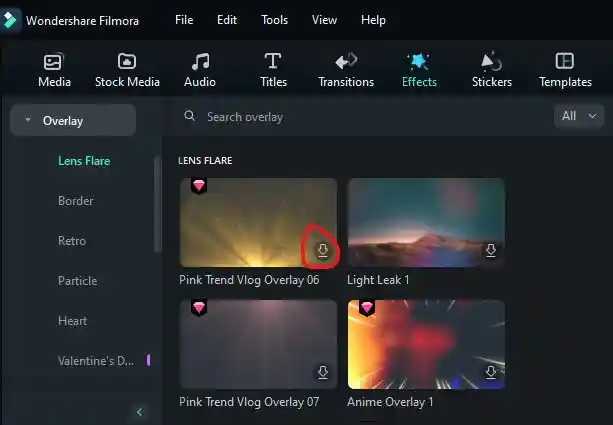
Start by opening your Filmora project. In the top menu, navigate to the “Effects” tab. Here, you’ll find a variety of overlays, including lens flare, particle, retro, and nature.
Click the download sign to download an overlay. You can hover over the overlay to preview before downloading.
2. Drag and Drop
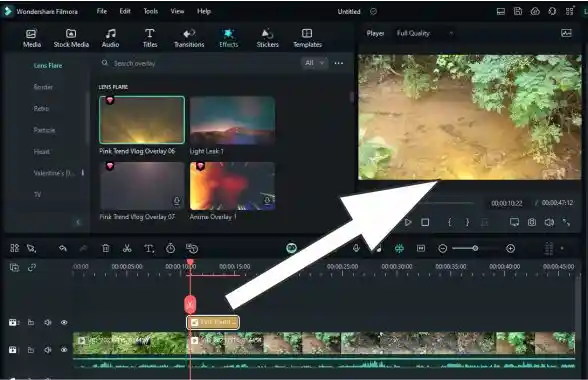
Once you’ve found the overlay you want to use, simply drag it from the Effects tab and drop it onto the clip in the timeline where you want the overlay to appear.
Overlays can be applied to specific clips or stretched across the entire project.
3. Adjusting Overlay Settings
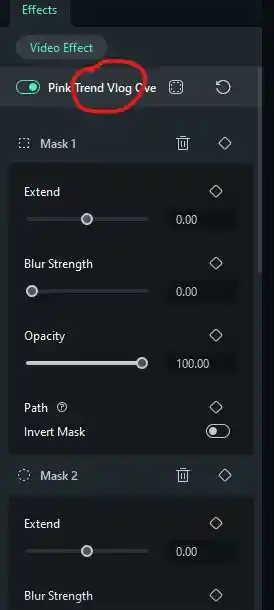
After applying the overlay, click on the overlay to select it. In the “Effects” tab of the editing panel, you’ll find options to customize the overlay. This includes adjusting the invert mask, extend, blur strength, and opacity settings.
Click the overlay name in the editing panel to expand the settings.
Click the symbol to “Add Effect Mask.”
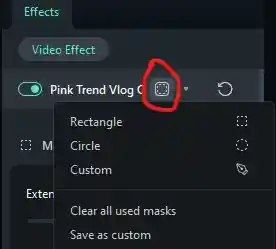
Use the nodes to control the mask in the preview window.

4. Layering Multiple Overlays
Experiment with layering multiple overlays to create unique visual effects. Adjust the order of the overlays in the timeline to control their stacking order. This allows for endless creative possibilities.

5. Overlays for Transitions
Consider using overlays for smooth transitions between clips. Applying a subtle overlay during transitions adds a professional touch and helps maintain visual continuity throughout your video.

Combining two clips often results in a slowdown at the junction point where the end of one clip meets the beginning of another.
Opt for overlays to guarantee seamless transitions and eliminate any abrupt disruptions in the flow.
Enhancing Aesthetics with Filters
1. Accessing Filters
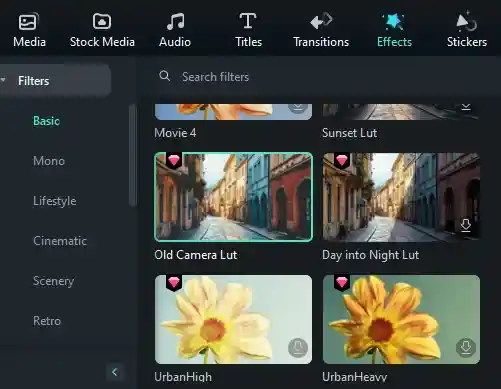
In the top menu, navigate to the “Effects” tab and click on “Filters.” Here, you’ll find a collection of filters that can dramatically alter the look and feel of your footage.
2. Applying Filters
Choose a filter that complements your video’s mood or theme. Drag the selected filter and drop it onto the clip in the timeline. Filmora provides real-time previewing, allowing you to see the impact of the filter instantly.

3. Customizing Filter Intensity
Click on the filter to access customization options in the “Effects” tab in the editing panel. Adjust the intensity of the filter to achieve the desired visual effect.
Click “Add Effect Mask” for more customization options.
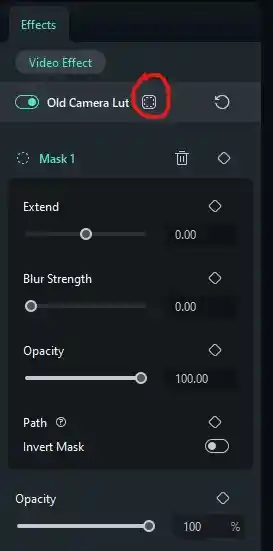
This feature is particularly useful for achieving a subtle or more pronounced look.
4. Creating Consistency with Filter Presets
To maintain a consistent look across your video, use the same filter preset for multiple clips. This creates visual cohesion, especially in projects with diverse footage.
Conclusion
By incorporating overlays and filters in Filmora, you have the tools to elevate the visual appeal of your videos and infuse them with creative flair.
Whether you’re aiming for a nostalgic film look, a futuristic vibe, or something unique, these features empower you to bring your creative vision to life.
Experiment, play with different combinations, and let your imagination guide you as you explore the endless possibilities of overlays and filters in Wondershare Filmora.

I began reading this phenomenal site earlier this week, they create stellar content for visitors. The site owner is doing a terrific job of engaging the audience. I’m impressed and hope they persist with their wonderful efforts.
Great!